Editor's
note: There isn't much I wouldn't eat when you've added Rendang
sauce to it, and these fish cakes are definitely on the fab side of
that scale. For something that looks fantastic (the taste needs no
introduction) it's a remarkably straightforward recipe. Like a lot
of the recipes on the blog it's practical in that it can be done in stages whenever you've got the time. Worth a shot!
Your recipe
reservoir
Everyone
has their own favourite recipes, for me the success of any recipe is
the frequency I use it and its versatility. I'm sure you've
already got your own reservoir but there's always room for more!
It's
the working week suppers that are the most tedious, so here are a few
more ideas that will give you back your evenings. My next addition
to your collection is a “fish supper dish” and lends itself to
prep ahead whilst you're in the kitchen cooking and your oven is on.
Spiced
Asian Fishcakes … with a sauce and a side
The Ivy fishcake
recipe is the best I've ever used. This is my version - Spiced
Asian Fishcakes with some added
bits and pieces.
(makes
8 – freeze what you don't use)
800g
dry mashed potato, no cream or butter added
650g
salmon fillets
2
tbsp tomato ketchup
2
tsp anchovy essence
3
tsp English mustard
salt
and black pepper
1
medium onion, finely chopped – use a
sweet
variety if possible a Spanish if not
1
tsp each of ground coriander, curry powder
and
garam masala
drop
of rapeseed oil
Plain
flour for coating
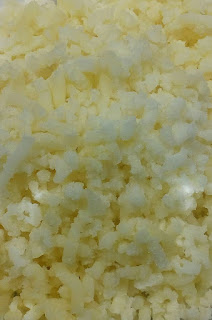
This
is one recipe where I'd recommend using a ricer to give you a lump
free mashed potato. It's definitely worth the effort. It can be
made ahead, boxed or bagged and fridged.
I bake
my salmon fillets, tightly wrapped in foil on a baking tray –
180fan/200c/Gas 6 for 15 minutes. Leave wrapped to cool then flake
the salmon then box and fridge until ready for use.
Sauté
the onion in a drop of rapeseed oil and add 1 tsp each of coriander,
curry and garam masala – 2/3 minutes on a medium heat. Cool and
set aside, box and fridge until ready for use.
When
you're ready to roll gently mix together the potato, salmon, ketchup,
anchovy essence, mustard, onions and seasoning. Mould the mixture
into 8 round cakes and refrigerate.
When
you're ready to serve preheat the oven 180fan/200c/gas 6. Lightly
flour the fishcakes and fry them until they are coloured on both
sides. Bake for 10/15 minutes.