Saturday, 30 March 2019

There's more …


Serving suggestions and bits and pieces.

You'll need a large bowl for your “lettuce cups” and smaller bowls for your sides.

The sides

50g/2oz bean sprouts
Handful of crushed, salted peanuts
Sweet soy sauce (Kecap Manis) for drizzling

You may want to increase these amounts depending on the size of the appetites!

Place the wok in the centre of your table with the bowl of “lettuce cups” and sides of the bean sprouts, crushed peanuts and sweet soy sauce in small bowls so that everyone can dive in, fill the lettuce cups and sprinkle and drizzle to their hearts content.

If you wanted another extra, serve flat breads too or wraps – perfect too for any lunch box leftovers for the next day.

This is very much “every man/woman for himself/herself” kind of supper.

It's up to you what you do

It's not a long list – the sauce can be made up, boxed and fridged. The veggies can be chopped, sliced, bagged and fridged.

If you'd prefer a vegetarian or vegan version then Quorn mince or pieces are perfect alternatives.

A sort of finger food – fast, filling and fabulous, even though I say so myself!

Now back to reality and more ideas …


for your multitasking working week suppers.

How about choosing roast pork for your Sunday roast? It would be perfect for my next idea – ideally choose a roast that's big enough to give you 500g of leftover pork.

A stir fry makes the best and quickest use of your leftover roast so you'll need a wok!

San Choy Bow is Chinese and here's my useless bit of information - “sang choi” means lettuce in Cantonese.

Here goes :
San Choy Bow

Little Gem lettuce cups
(if Little Gem not available use Iceberg -
smaller inner leaves) – I would say 3 per person
depending on size of appetites
500g/1lb2oz leftover roast pork, shredded
1 garlic clove or garlic paste
1 red chilli, finely chopped
150g/5oz chestnut mushrooms, finely chopped
6 spring onions, finely chopped
225g/8oz water chestnuts, rinsed and chopped
200g/7oz bean sprouts, chopped
Glug of rapeseed oil

3 tbsp hoisin sauce*
1 tbsp soy sauce*
1 tbsp sweet chilli sauce*
1 tbsp dry sherry or Shaoxing (Chinese rice wine)*


Wash your lettuce, pat dry ready to serve.

Combine the four ingredients marked * to make a sauce – this can be made ahead.

Over a high heat add the oil to your wok and cook the garlic and chilli for a minute. Add the mushrooms, onions, water chestnuts and bean sprouts until mixed through and sizzling followed by the shredded pork – 2/3 minutes.

Add the sauce mixture, stirring and sizzling until completely combined for a final 2/3 minutes.

There's more!


Speed sweet – Cherry Eton Mess …

Assembly :

begin with the rubble, add a trickle of compote
and then place your dollop of truffle in the centre,
add a layer of crushed meringues and begin again

with layers of the Amaretti, compote and meringue
add a final trickle of compote

Here it is :


et voila!

Everyone who has road tested this speed sweet has loved it so now it's up your sleeve, whether as a slob night sweet treat or an emergency store cupboard dessert.


Sweet treat – Cherry Eton Mess … assembly and photo guide


Set your stall out :


the rubble


the trickle


the truffle should be the size of a walnut
40g/1½oz
the dollop


and the crush

Now we're ready to assemble!


Friday, 22 March 2019

Speed sweet – Cherry Eton Mess – short cuts or not?


I said earlier that you could short cut two elements or even all four!

The short cuts

Amaretti biscuits

Good quality Amaretti biscuits are a great product – they have a long shelf life which I why I buy mine. Keep your eyes peeled for deals – you get what you pay for these days and these biscuits are not cheap.

Buy ready made chocolate truffles

Buy a drum of ready made meringue kisses

Buy ready made compote in either jars or sachets

Each of the above products is an excellent “emergency” store cupboard ingredient – a speed sweet at your fingertips!

Or not!

I stand by why I said – I buy my Amaretti biscuits, you can make your own but in this instance I want a stash of biscuits in my store cupboard and home made will not last – delicious though they'll be!

Making your own ganache

There are 3 options :

Equal parts chocolate and cream

While still warm this ganache is pourable and can be used to drizzle chocolate ribbons or glaze cookies or cakes. It can also be used as a cake filling. As it starts to cool it thickens and takes on a more spreadable consistency.

Two parts chocolate to one part cream

Increasing the percentage of chocolate makes for a thicker ganache. This ratio is used for truffles. Can also be used as a glaze or piped frosting.

Two parts cream to one part chocolate

A ganache with more cream than chocolate is runny – warm and mousse like at room temp. When warm it can be poured over a cake to give a glaze.

I used equal parts of chocolate and cream – i.e. 300ml of double cream to 300g of plain chocolate drops. I find semi-sweet 50% ish cocoa solids hits the “middle for diddle” and gives a rich truffle texture and flavour.

To make your own meringue kisses


To make your own compote


There's a step by step assembly and photo guide coming next!


Speed sweet … the translation


rubble – crushed Amaretti biscuits

dollop – hidden truffle centre

crush – crushed meringue kisses

trickle – cherry compote

For those who'd like clarification a dollop is about a heaped tablespoon. There are other explanations that say it should be a small amount. Personally I think it depends on the size of your dish or glass and is probably somewhere in the middle. For the small sundae pot my dollop of chocolate truffle was approximately a dessert spoonful.

Bear in mind that if you're filling a sundae glass it should be a larger amount and it should be circular or even ovoid in shape. A small tip – use an ice cream scoop dipped in boiling water for your ganache, it'll help you get the initial shape. Use gloved hands to mould the shape that suits.

I chose a small sundae pot for this demo, measuring 8.5cmsx7cms/3½”x2¾”. Perfect to make ahead and stash in the fridge to do its magic and they have lids. The tall sundae glass measures 18cmsx7cms/7”x3”.

The short and the tall of it :


This speed sweet is perfect to pull from your treasure trove, whether freezer or store cupboard - pantry if you're posh – back in the day it used to be the other way around!


Speed sweet – rubble, dollop, crush and trickle


Here's my latest concoction … remember when I said that I had something else, “cherry-wise” up my sleeve – here it is.

Before I begin with chapter and verse I should say that this sweet is to go with your “slob” night, nay weekend sweet treat. It fits the bill because it's simple and easy and you can make it as fancy as you like or as messy as you like!

I would make one suggestion – the same as always – set your stall out before you begin. There are four elements – two to make and two to “short cut” if you wish. Actually you could short cut all four if you prefer - none are difficult.

The clue is in the text :

Cherry Chocolate Eton Mess

One serving

6 Amaretti biscuits, crushed to rubble, not dust!
A dollop of chocolate truffle (aka ganache)
3 meringue kisses crushed to a rubble, uneven
sizes even better
100g Cherry compote to trickle

This is definitely in the “fly by the seat of your dessert pants” category. It's good fun to get creative. Decide on the glass or dish you're using to serve your mess. Here's a thought … for a slob night or for an informal supper you could make these in tall sundae glasses and serve one between two guests, it might be an idea to make sure they know one another or may be not!

Read on ...

The brutal truth … the calzone and the bread sticks

I served the bread sticks as an appetiser, the traditional way, with bowls of balsamic vinegar and extra virgin olive oil – if you don't hear anything other than silence – I know that sounds really strange but you know what I mean, then all's well!

Then came the calzone … more silence, later the comment was “loved it, layers of lusciousness!”

Hold the front page – there's another version of the dough :


wholemeal – yippee!

I've not finished yet … watch this space.


Saturday, 16 March 2019

The divine dough – breadsticks photo guide


cut your dough into eight pieces – in this
case four!


roll between your hands into a sausage
shape


leave your breadsticks to rest and
then brush with melted butter and add
garlic salt and finely grated Parmesan


the breadsticks – fresh from the oven


Tempted?!

Whilst I'm on the subject of divine dough …


Bread Sticks

Using my favourite new product – pizza dough from The Northern Dough Co. - here's another idea and it's not pizza. The fastest bread sticks ever.

One dough ball
15g finely grated Parmesan
30g of unsalted butter
garlic powder or garlic salt to sprinkle

Take one dough ball and defrost in your fridge.

When defrosted lightly flour a baking tray and your working surface - cut the dough into 8 similar sized pieces. Roll each piece of dough between your hands to create a sausage shape. As a guide I rolled out each piece to 12cms in length (4½”) making sure to leave space between each piece. Cover the bread sticks with cling film until you're ready to garnish and bake.

Leave at room temperature for your bread sticks to prove – in other words to “rest”. I left mine for an hour.

When you're ready pre-heat your oven as high as it will go – in my case 220fan/240c/Gas 9.

Melt the butter and brush each bread stick, sprinkle with garlic powder or garlic salt if you prefer and finish with finely grated Parmesan.

Bake on high for 4 minutes.

Serve with pesto, or, my personal favourite the classic mixture of Balsamic vinegar and extra virgin olive oil and turn it into a help yourself starter with Italian meats and cheeses – yum! You could try a little fusion and serve with a baked Camembert.

Photos coming up ...

The pizza photos completed


the divine dough folded then egg washed


the divine dough baked


the Calzone cut in half


The verdict … I am my own worst critic and I loved it. It was too big for me so I ate half and then wrapped the other in foil and re-heated for supper the following evening – it was excellent.

One thing is for certain, I'll be repeating my wacky idea and serving it to friends – stand by for the brutal truth!


Lets talk about pizza and see the photos!


Quorn pieces, cooked and left
to marinade


The divine dough on the pizza mesh


The divine dough with sauce


The divine dough – the loading begins -
the Quorn


the sliced mushrooms, the black olives
and the mozzarella


There's more ...


Sunday, 10 March 2019

A handful of this and a sprinkle of that


I did say I was going to have some fun with flavours and textures I liked – eek.

First things first, place your base on a mesh pizza mat or a pizza stone if you prefer. You'll be very upset when you realise you've not - having loaded your base with ingredients – too late was the cry, unless of course you're a champion juggler! 

My tomato sauce” is hoi sin and spring onion sauce and for the purpose of this experiment I used a ready made stir fry sauce - spread 2 tablespoons over the base. We'll come to a home made sauce later.

I'd rather choose say three or four toppings and see how it goes and I'm loading half the pizza base. You'll also need one egg, beaten to glaze and help glue the edges of the calzone.

I'm using Quorn pieces which I've cooked from frozen – 100g, cooked in hoi sin and spring onion sauce, a couple of of tablespoons of sauce is fine – 12 minutes cooked ahead and fridged when cool and the pieces continue to marinade.

Next a sprinkle of mini portabella mushrooms, peeled and finely sliced. I used six or 60/70g.

I then added a handful of torn pieces of Mozzarella cheese – approximately 75g or half a ball.

Finally I added a sprinkle of pitted black olives, sliced – my handful is about 30g.

Let your inner Jackson Pollock go and create your own masterpiece!

Fold the unfilled half over and twist the edges to seal. Glaze the calzone with the beaten egg and bake in a pre-heated oven 220fan/240c/Gas 9. I baked mine for 12 minutes to suit my taste. Add another couple of minutes if you prefer a darker colour.

It's time to back up my mouth – and a wacky idea – step by step photo guide is on its way.


The divine dough


I know I'm very fond of saying that recipes are only meant to be a guide and so not set in stone – here's another of my favourites – rules are meant to be broken.

My favourite style of pizza is a calzone – you know the one I mean, you cover the whole base with sauce then half the base with toppings of your choice and fold it – it always reminds me of an Italian version of a Cornish pasty – which is meant to be a huge compliment to both iconic delicacies!

The best place to start is at the beginning and the base, or more accurately, the dough. Finally I think I have found the answer … The Northern Dough Co. (click here for more info!)  gives you two individually wrapped balls of dough each giving you a 12 inch pizza whether classically flat or folded into a calzone. The dough is the best texture, not too sticky and after lightly dusting your surface with flour it does exactly what it says on the box – you can roll, push, cajole and persuade into your shape of choice. The dough comes ready frozen so check out your freezer aisle. You can defrost in your fridge and then roll out or you can microwave – whichever method suits you best.

Here are the photos so far :


The Northern Pizza Dough Co.


A divine dough ball – ta dah!

Lets talk about pizza …


what is there to say - plenty! Everyone has their own idea of the perfect pizza and made well it's the best “fast food” whether you prefer a thin, thick or stuffed crust.

We covered Monday to Friday suppers in our “multi-tasking morning” aka making the most of your oven when cooking a Sunday roast! Before we resume with a few more ideas for your working week suppers you deserve a night off!

Saturday night should be designated “slob night” - by slob I mean lazy – feet up in front of your favourite film at the weekend, so easy, uncomplicated but tasty food is required and I don't mean reaching for your favourite takeaway that I know you have on speed dial!

Those who are kind enough to have been reading my blog for a while will know that my mission is to make your life in the kitchen easy and so am not averse to recommending, for example, using a puff pastry sheet instead of making your own. Why not, when there's a quality product available! Which brings me to pizza bases. They are available in all sorts of guises from ready cooked bases where you add your own pizza toppings – probably more suitable as a Frisbee – to packet mixes and dough mixes and then there's the ready rolled dough i.e. just like a puff pastry sheet but pizza dough in a box.

I'm on a mission, which is to find the most convenient and delicious pizza base – if you like it's a half way house for my Saturday slob, not home-made but freshly baked with a decent product. Everyone deserves a night off!

Next comes my confession – I get bored with the same old pizza toppings and, bizarrely, I have hated tomatoes all my life but will tolerate the passata style topping that is used for pizzas. My plan is to have some fun with a wacky pizza using flavours and textures I like.

What's the worst that can happen?


The finale – dessert


I had to put on my thinking cap and consider the lactose intolerance.

Every now and again you strike it lucky and a dessert you've served in the recent past comes up trumps. At the end of last year I gave you “Sticky Toffee Orange”. The downside is that I couldn't serve the sticky toffee sauce, the upside – there's always an alternative!

My alternative was the sticky toffee loaf cake, fresh orange segments, an orange drizzle and a praline sprinkle.


The orange drizzle is a piece of cake – sorry!

Orange Drizzle

200g icing sugar
250ml orange juice – no bits

Put the sugar and orange juice in a small saucepan and heat gently so that the sugar dissolves. Bring to the boil and then reduce the heat and simmer on a low heat for 10 minutes.

All four elements I made ahead and all perfect for the lactose intolerant! I served my Dil her bowlful with Arla Lacto Free Cream suitable for whipping, cooking and pouring – suitable for vegetarians too.

My Dil loved it, particularly the cake which she could not believe contained dates. You can always tell how well your food is received when people remember what they've eaten. I received a message from my Dil after she had arrived home … here's a snippet “… the cake was ****** lovely … actually the past two days have been ****** lovely”.

If you want a gem of an addition to your treasure trove then may I suggest you make a sticky toffee loaf cake and freeze it, preferably in half, just in case you don't use a whole cake – very funny. Actually you can make and freeze the drizzle and praline too!

I think you'll be glad you did.


Sunday, 3 March 2019

The main – step by step photo guide continued


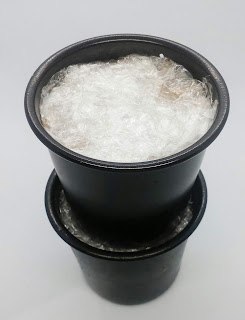
the mould packed and covered with cling film


the moulds, packed and stacked


the timbale


a personal gravy boat – or should it be jus boat!


it was worth the effort


As for me – a stress free cook and very happy with a main course served with love and a smile. It went down a storm, as they say!

The final flourish – dessert – on its way.


The main – step by step photo guide


We have loads of photos to get through :


the lined dariole mould


the tamper – a great piece of kit!


the stripped lamb


the stripped lamb, finely chopped


the lined mould, packed with the lamb


More about the main


Before I continue with the lamb and the jus I have to decide what to serve with it. I have deliberately spread the “evening” meal beginning at 5pm with the starter. I have a dessert to serve too and so do not want too heavy a dish. Keep it simple – three elements, or four including the jus – roast potatoes and oven roasted lemon glazed carrots. The carrots are as easy as falling off a log! Peel and cut four carrots into small batons of a similar size and place on a large sheet of foil placed on a baking tray. Season with salt and black pepper, add a couple of knobs of unsalted butter and a glug or two of lemon juice. Wrap up tightly into a parcel and you're ready to roast.

Once again the joy of both these elements is that they can be prepped and part roasted ahead. If you roast your potatoes and carrots for 30 minutes either the day before or on the morning if you're around (I'm out for breakfast!) your entire main course will take 30 minutes to finish off and you'll be ready to serve.

Pre-heat your oven 180fan/200c/Gas 6.

Gently ease the cling filmed lamb out of the dariole moulds, peel off the cling film and place upside down in the shape of a tower on a baking tray. You'll have the tray of lamb timbales, a tray of foil wrapped carrots and a dish of roast potatoes – cook for the remaining 30 minutes.

The only item on your hob is the saucepan of jus you've removed and uncovered from the fridge, ready to warm through. Decide how you're serving – I recently treated myself to miniature gravy boats, very convenient for your guests.

Step by step photo guide up next.


The main … posh lamb!


This is a dish I first mentioned way back in 2016 under the label on the blog “Posh lamb”. At that time I used lamb shanks – this time around I'm using shoulder of lamb and there's a step by step photo guide too. The dish also uses the dariole moulds for a savoury dish.

As a guide – a shoulder weighing 1.8kg. I asked my butcher to cut the shoulder into four pieces – it's much easier to brown and then fit into the slow cooker. Seal and season (with salt and black pepper) the pieces of shoulder on all sides and then place into your slow cooker with lamb stock and garlic paste if you wish and cook for six hours.

Whilst your lamb is cooking prepare the dariole moulds. Using a pastry brush grease the inside of the moulds. How many dariole moulds you want to use depends on how many you're serving. Two timbales per person is filling but you may want three if you've large appetites to satisfy. To be safe I prepared nine – any leftovers can be frozen for another time. Line each greased mould with cling film ensuring you've an overlap.

Take the lamb out of the slow cooker and set aside in a large dish – I used a foil version – to cool. Using a knife and fork, strip the shoulder and place on a sheet of foil. Discard the remaining bones and bits.

At this point wrap the stripped lamb in foil and fridge it. When time permits chop your lamb finely. Next up is a very useful piece of kit – a wooden pastry tamper, aka a pastry pusher – its actual use is to form tart shells with the large end and for mini baking tins for canapés or bite sized pies with the small end. In this instance it's the perfect tool to press the lamb tightly into the mould, you'll probably need to fill and press twice, so that each mould is two thirds full. When the moulds are full cover with the overlapped cling film. Return the moulds to the fridge and stack in twos.

Now for the Redcurrant and Port jus :

227g jar of redcurrant jelly
200ml of Port

Melt the jelly in a pan over a gentle heat, add the port and bring to the boil, uncovered for 10-12 minutes until syrupy. Leave to cool then cover and fridge until ready for use. You can freeze the jus ahead if you prefer, it will keep for a month. Defrost it at room temperature and re-heat to serve.

All prepped ahead and ready when I am!