Sunday, 25 March 2018

Champ and Colcannon Recipes


MiamMiam
School of Cookery

Here they are :

Pea and Spring Onion Champ

1.5kg Potatoes, scrubbed
100g butter
500ml/18 fl oz milk (or if a richer consistency
75% milk to 25% double cream)
450g frozen peas
75g spring onions, chopped
4 tbsp chopped parsley
salt and black pepper

Cook the potatoes in salted water until tender, drain, peel and mash. You could use a ricer for absolute “lump free”. Add half the butter – 50g, after mashing or ricing. Place the milk/cream in a pan with the peas and onions and boil, gently, for 4/5 minutes. Add the parsley, take off the heat.

Add the potatoes, keep some of the milk back – you may not need it all. Season to taste and beat until creamy and smooth – add more milk if required.

Serve piping hot with a knob of butter melting in the centre.

P.s. If you wish you could add grated mature cheddar cheese.

Colcannon

Savoy cabbage, finely shredded – half a cabbage
approximately 350g in weight
30g butter
Bunch of spring onions finely chopped
1.5kg Maris piper potatoes,
Salt and black pepper

There are no exact weights here – you may have leftover mashed potatoes and cabbage – it really doesn't matter.

If you've not got leftovers, cook the potatoes in salted water until tender, drain, peel and mash. You could use a ricer for guaranteed lump free.

Put the cabbage in a pan with the butter and cook over a low heat for 2-3 minutes until tender, stirring frequently.

Add the spring onions and cook for another minute or two. Mix with the mashed potato and season well.

If you've cooked your potatoes ahead or are using leftovers, pop the completed dish into a pre-heated oven (180 fan) for 20 minutes. You could use oven-proof ramekins and serve straight to the table.

Both of these potato dishes are quick and easy but, above all, delicious!

Fast Food for Easter – mains – my second thought


For the meat eaters – keep it simple – lamb shanks. Seal the shanks in a large frying pan and slow cook in lamb stock – as a guide, 4 shanks – cook for 4 hours. They can be cooked ahead and set aside, covered, to cool. When you are ready to serve place the shanks in a foil tray or any dish that has sides and brown in a pre-heated oven 180fan/200c/Gas 6 for 20-25 minutes. Check after 20 minutes - the shanks should have a roasted, crispy skin.

Serve the lamb with Pea and Spring Onion Champ or Colcannon. If you like the thought of either, the recipes for both are up next. If you don't want to be bothered then you can't go wrong with good old mashed potato, add salt and pepper, a generous knob of butter and add a couple of cloves of roasted garlic.

To serve - a generous helping of potato and then place the shank on top. The pinnacle of this gloriousness is the onion sauce that you're going to pour over the top.

One of the great marriages in my view – lamb and onions, particularly in sauce form. It may be considered old fashioned – don't knock it until you've tried it. Here's my recipe – there's nothing like making a sauce to sooth and take away the stresses and strains of life. Don't panic it really doesn't take long.

Quick Onion Sauce

3 medium onions, peeled and chopped – you should
see pieces of onion so not a fine dice
Glug of rapeseed oil and generous knob of butter
30g plain flour
500ml milk
Salt and white pepper
Freshly grated nutmeg - optional

Soften the onion in the oil and butter, sprinkle over the flour and stir continuously for 2/3 minutes to cook the flour. Gradually add the milk, stirring continuously. Use a heatproof spatula to stir, you'll cover the base of the saucepan and stop the sauce from going lumpy.

Let the sauce boil when you've added all the milk, then remove from the heat and season with salt, pepper and nutmeg. When cooled slightly place a sheet of clingfilm on top of the sauce to prevent a skin forming.

If you're not familiar with nutmeg have a go in this recipe, it really does work.

Happy Easter!


Fast food for Easter – mains


Just a couple of thoughts you might find appealing – there is only one connection between the two – they are both easy.

My first thought :
Fast and fancy fish pie

All the following elements can be prepped ahead.

Serves 4

2 large baking potatoes – stab carefully with a
paring knife, wrap in foil and bake for 1 hour at
180fan/200c/Gas 6
Set aside to cool then slice thinly – skin on or
off – personal choice

Whilst your potatoes are baking wrap 400g of fresh
fish in foil and bake for the last 15 minutes of your
potato baking time – use a timer!
Set the fish aside to cool

Your fish can be a mixture of whatever you choose – for example, mix smoked haddock or cod with salmon and prawns – it's whatever floats your boat.

Make a batch of Alfredo Sauce (see “The hot idea”) for your fish.

When you're ready to assemble :

Preheat your oven 180fan/200c/Gas 6.

As you know I use foil trays – in this case 24x24cms – available from Wilkinsons if you wanted a supply – otherwise a square casserole.

Open up your foiled fish and tip it into a large mixing bowl. Break the fish into chunks, gently, then season with black pepper. There will be jelly from the cooked fish – discard or include – it's all flavour and will combine with the sauce you've made. If you've not used any smoked fish then you may want to add a sprinkle of salt. Add your Alfredo sauce and fold together, gently. If you've made your sauce the day before it will have set – if you want to make life easy then warm the sauce gently to loosen (in a saucepan, not the microwave) and then add to the fish.

Tip the mixture into your tray or casserole. Add the sliced cooked potatoes, add a knob or two of butter and ground black pepper. If you're feeling really decadent then sprinkle grated Parmesan over the top. Bake for 25 minutes until golden brown.

If fish is not your bag, take a look at my second thought!


The hot idea …


is one of my favourites – basically mushrooms on toast – or a bowl of mushrooms with the fresh soda bread to dip in – don't forget a fork to spear the mushrooms!

You have two choices - for a creamy hit – make the Alfredo Sauce – whenever you've got five minutes. Bake 500g of chestnut mushrooms, halved, with a drizzle of rapeseed oil for 10 minutes in a pre-heated oven 180fan/200c/Gas 6 so they release the mushroom liquor, lift the mushrooms from the liquor and set aside. Make a batch of Alfredo Sauce to your taste. Place the mushrooms in a warmed bowl and add the Alfredo to taste. Cut thick slices of soda bread to tear and dunk! The traditional route is to toast the soda bread and place the mushrooms and Alfredo on top but you will need a knife and fork.

To save you time, the Alfredo recipe :
Alfredo Sauce

2 tbsp unsalted butter (50g)
400ml double cream
100g freshly grated Parmesan
freshly ground black pepper

Gently heat the butter and the cream together, stirring, until the butter has melted, then stir in the Parmesan. Slowly bring to a gentle boil, turn down the heat and simmer, stir continuously for a minute or so until you have a smooth, creamy sauce.

The sauce can be made ahead and fridged.

For a sharper, zingy hit try Mushrooms in Balsamic :

Mushrooms in Balsamic

4 tbsp rapeseed oil or similar
500g chestnut mushrooms, halved
4 cloves of roasted garlic or crushed cloves
pinch of salt
4 tbsp Balsamic vinegar
2 tbsp soft dark brown sugar
60g grated Parmesan

In a medium size frying pan heat the oil, add the mushrooms, garlic and a pinch of salt. Cook on high for 5 minutes until browned. Mix the vinegar with the sugar and pour over the mushrooms. Stir until syrupy – 1-2 minutes. Serve on toasted soda bread and sprinkle with Parmesan to serve or in a bowl with sliced soda bread ready to tear and dunk.

Make sure you have a bib ready!


Who knows what …


...will take your fancy over the Easter holidays when you've a long weekend to please yourself -
more to the point who knows what the weather will do this year – today it's snowing, with more promised and plummeting temperatures yet again.

It certainly doesn't make you think about Spring and the food you'd associate with it. It's difficult to strike the right note when you could be wearing thermal underwear and freezing or a sleeveless T shirt, shorts and flip flops!

We've covered all things chocolate for Easter, time to turn our attention to a few savoury bits and pieces to tempt you.

I'm sticking with the comfort theory and revisiting an old favourite or two.

There's nothing that says comfort better than home made bread – Soda Bread in particular.

Check out the Bread Label on the Blog – Saturday 19thNovember 2016 “Nothing is ever straight forward!” for the Soda Bread recipe or check out “I promised Easter treats and so …”  for a Cheese and Onion Muffin Loaf recipe too.

Two ideas to go with the bread – one cold, one hot.

The cold is the fastest paté you'll ever make.

Smoked Mackerel Paté

250g smoked mackerel
250g plain quark
2 tsps of creamed horseradish
glug of lemon juice
black pepper

Skin the mackerel, break up into small pieces and put into food processor. Add the quark and blitz with the mackerel then add the lemon juice, black pepper and horseradish, blitz again. You can gauge the consistency to your personal taste.

After you've made the paté you could add any of the following :

finely chopped sweet onion
finely copped black olives
chopped flat leaf parsley
finely chopped capers

Cut thick slices of soda bread, tear and spread liberally with the paté – that's lunch sorted.

If you've not come across quark it's a soft cheese made from skimmed milk – not nice on its own but a great product to use in this recipe – you'd never know it's healthy I promise you – it tastes great. You can use cottage cheese if you can't find quark.

The hot idea next …


Sunday, 18 March 2018

The nincompoop – aka the fool!


I thought this little missive might make you smile.

It may not have escaped your notice that the weather in the UK has been the absolute pits - the worst we've had for a decade at this time of year.

Horrible weather makes you want comforting food, sweet or savoury.

This weekend, snowed in, was not going to be good and to prove my point here's my back garden (yard) :


Never wanting to waste good cooking time I decided to make Grandad Jack's Tea Loaf and so weighed out the fruit, added the mug of strong tea, covered it and left it to do its magic overnight.

A spot check revealed I only had one egg – not a problem, the following morning I attach my snow grips to my boots and trudge to the village shop where they sell fresh eggs – dedicated or what.

How virtuous am I – not only fresh eggs but hard exercise in the snow too.

Back home on went the oven to pre-heat – it takes 5 minutes to mix the cakes and away we go … or so I thought.

You know how I'm always droning on about store cupboards and fully stocked freezers, not to mention planning blah, blah.

Having soaked the fruit and climbed Mount Everest – the equivalent in my world anyway – I only needed three more ingredients – optional cherries, check - one mug of soft light brown sugar, check - two mugs of self raising flour – you have got to be kidding. I keep my flour(s) in large glass pots for two reasons, one – I use both so frequently it makes sense and two I can see at a glance how much flour I've got left – OR NOT!

I had only one mug of flour. I'm struggling to decide which expletive would best suit my discovery – upset puts it mildly – stamping feet and throwing toys out of pram would be better. It just serves me right.

Just in case you think I'm making this up – here's a photo of the empty jar :


What's that expression “necessity is the mother of invention”? Having resisted the urge to retire to a darkened room with a bottle of gin and a straw (just joking) I went rooting in my pantry instead. The flour fairies had not been – no reserve bag of self raising flour had materialised. What I did find was a bag of organic self raising wholemeal flour. It's worth a shot – hey it could turn out well.

It did – here's the proof and a photo of the sliced cake.


The moral of the story – we all need a kick in the pants occasionally.

Some things are meant to be – another tweaked recipe.

P.s. If you'd like the recipe check out “Cake” label – Sweet week Grandad Jack's Tea Loaf.


Veggie Rendang – the shucking and the photos


The shucking stuff

Tip your chick peas onto a shallow tray lined with kitchen roll. Add another layer of kitchen roll and move the kitchen roll using the flat of your hands for 30 seconds. Lift the kitchen roll and you'll see the outer husk of the chick pea comes away. You don't have to do this if you don't mind the husks – I think it's worth the effort and you can shuck whenever you have five minutes. This is all stuff that you can prep when it suits you.

It's academic anyway if you choose to use other veggies – the choice is yours!

The photo stuff


This curry really appeals to me – the ultimate in “feet up in front of a boxed set” food – a bowl of curry, bread and a spoon … what more could a girl want!


Veggie Rendang


Remember all our recent Indian bits and pieces – chicken salad … but not as you know it and Malai wali murghi (MWM) from Post holiday blues?

For a supper with friends I decided on the MWM, meatball size lamb koftas, and all the usual suspects, raita, mango and naan. The only element that was missing was for me – the veggie curry. Speed, as usual, was my main aim. Here's my veggie rendang.

You can make your own speedy rendang sauce :

Rendang Sauce
Serves 2

100ml coconut cream
50ml water
3 tsp brown sugar
2 tsp curry powder
(strength to suit your palate – I used mild
to suit my guests)
1 tbsp kecap manis
(sweet soy sauce)

Combine all the ingredients in a saucepan over a low heat and it's ready to roll. You can make this ahead and re-heat.

Add whatever veggies you like – do a fridge raid if you think you've got a miscellany of stuff that needs using up for a mid week supper. If your raid produces leftover cooked veggies that's great if not, then uncooked veggies should be cubed to the same size and sautéed in a drop of rapeseed oil. They don't need to be cooked through since you'll be adding them to the rendang sauce.

It's difficult to give exact quantities since I know from experience that meat eaters always eat the veggie stuff – don't ask me why it's one of the great mysteries of life! Some guests may take a spoonful to try or to compliment the meat and poultry dishes – to cover yourself I'd double the above recipe to serve 4.

I used onion, potatoes and chick peas :

1 medium onion chopped finely and sautéed in a drop
of rapeseed oil
500g baby potatoes (I used Cornish) cooked, cooled
peeled, cubed and bagged until ready to use
1 400g can of chick peas, drained, rinsed and shucked
2 handfuls of frozen petit pois – optional

There's a downside with chick peas … the shucking - just in case you're not sure about shucking it's to remove the outer covering of anything that is eaten from an oyster to cereal or corn.

I find it therapeutic but then I'm sad!


Rocky Road – step by step photos


Bag the Rocky Road in cellophane bags and add a chick or bunny and tie with yellow ribbon. There are loads of decorative bits and pieces out there and if you shop around you won't spend a fortune either.

Three different chocolate treats for Easter – all easy peasy – Pets D'Ange, Maya's Chocolate-Chip Cookies and Rocky Road Take 33!


Sunday, 11 March 2018

Rocky Road – Hints and Tips


After your Rocky Road has been fridged you can let your inner Jackson Pollock take over and decorate with 150g of melted white chocolate. You can microwave, use a bain marie or an electric chocolate melting pot. I know I've said it before - I'm not one for spending huge amounts of dosh on kitchen kit that gathers dust but this little pot is worth the investment. It's quick and easy to use and all you have to wash up is one small pot. You get three pots in the kit – each will take a maximum of 250g of chocolate. This element is entirely optional. If you do decide to decorate then you'll have to fridge the Rocky Road again to allow it to set.


You can portion the Road as you prefer – I cut it into bite size pieces, measuring approximately 3.2cms (ish) – you don't have to lose sleep over exact pieces! The good news – you get over 100 pieces. I find the best way is cut the slab in half then cut each slab into lengths and then each length into bite size pieces.

The Road freezes well as have all the others – you might want to freeze in smaller portions if you intend to use it as part of your own muddle invention. Bear in mind that you have the freeze-dried raspberries and strawberries in the recipe and so can add a fresh fruit to a muddle. I know that it goes against the grain to buy fruits that are out of season but you can get fresh strawberries and a little indulgence in this miserable winter weather lifts the spirits – that's my excuse and I'm sticking to it.

Here's a photo of the freeze-dried raspberries (10g) and strawberries (7g) - to give perspective the tubes measure 14 x 3cms. Try your favourite on-line grocer's search engine. If you live the in the UK then I may be able to save you time by saying that I bought mine from Waitrose.


Clever idea and they taste great in the Rocky Road.

Rigorous testing has of course taken place. The verdict – unanimous – better than all previous offerings and the shortbread ingredient is brilliant.

Step by step photo guide on its way.


Rocky Road – again


I know I can't leave it alone – I can't resist experimenting with different ingredients and I know that the consensus is “if it ain't broke don't fix it” but they also say “the exception proves the rule”.

Rocky Road – Take 33! - I know I exaggerate

225g each of dark and milk chocolate
300g shortbread
100g mini marshmallows
7g freeze-dried raspberry pieces
4g freeze-dried strawberry pieces
175g soft butter, unsalted - cubed
4x15ml tbsp golden syrup
150g brazil nuts, chopped

150g white chocolate to decorate

I used a foil tray bake – measuring 32 x 20cms.

Place the shortbread in a bag and bash away – a mixture of size of crumb is what you want.

Tip the crumb into a large bowl and add the marshmallows together with the raspberry and strawberry pieces. Add the chopped brazils.

Meanwhile, place the plain and milk chocolate, butter and golden syrup into a large saucepan and melt on a low heat.

Remove from the heat and leave on a cool surface for a minute or two and then tip the crumb et al into the melted chocolate and mix gently to ensure that the crumb mixture is covered. Tip it into the foil tray ensuring that it reaches all the corners. You will have a lumpy surface.

Fridge it for at least 2 hours – longer will not be a problem.

This smells really good … more good news to follow.


The chocolate chip cookie photo guide …


and adieu.

If you need to be convinced :


A definite candidate for an Easter treat.

Here's another thought – remember the “muddle”? You could use a microwaved, crumbled cookie as part of your creation, like this one :


Finally, huge thanks to “The Little Book of Chocolat” - it has been so much fun – this book does “exactly what it says on the tin”!


The chocolate chip cookie scale


As we have the Beaufort Scale for measuring wind speed from calm to hurricane and the Richter Scale for the magnitude of an earthquake it seems only right that we should have a Chocolate Chip Cookie Scale which I now dub “The Squidge Scale”. We all have our own specific requirements – is it squidgy or just soft – it's a quandary!

Here come the usual hints and tips from the recipe :

I used unsalted butter, ordinary caster sugar and ordinary brown sugar.

Glue” or grease the parchment with a little butter to secure.

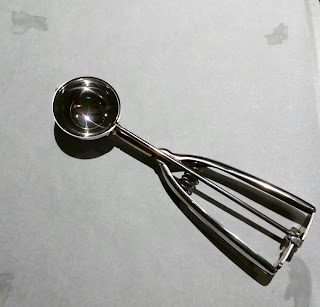
Size-wise it depends how precise you wish to be with your cookies – I used an ice cream scoop but a dessert spoon or tablespoon will do just as well.

Remember to leave space between each cookie.

Resist the urge to prod and move the cookies until they've cooled - “a prod-free zone” if you will – go build a bridge or clean your oven!

I carried out the mandatory freezer experiment – academic I think since I'd be surprised if they didn't all disappear immediately if not sooner. You could make a batch – cool them and then freeze - bagged or boxed.

When the urge becomes too much allow the cookies to defrost. Based on a measurement of 6-7cms in diameter per cookie and using a 700w microwave cook on medium for 10 seconds.

The microwave process is an exact science and I'd definitely suggest you begin as above and then apply the all important squidge test – or you can prod if you like! For me the magic is breaking the cookie open to reveal a soft inside with warm chocolate chips that still keep their shape.

Oh yes please!


Saturday, 3 March 2018

9 down – the end - nearly!


Here is my final choice from The Little Book of Chocolat :

Maya's Chocolate-Chip Cookies

Every child should know how to make these.
For the days when only cookies will do.

Takes 40 minutes/makes 15-20

200g butter, soft
50g unrefined caster sugar
120g unrefined light brown sugar
120g dark chocolate (drops or chopped)
175g oats
200g self raising flour

Heat the oven to 160fan/180c/Gas 4. Line a baking sheet with baking parchment.

Cream together the butter and sugars, stir in the chocolate and oats, then finally add the flour and blend.

Roll the mixture by hand into 20-25 even-sized balls. Flatten them sightly with the palm of your hand and place on the baking sheet, giving them enough room to spread when cooking. Bake in the oven for 15-20 minutes. Once golden and cooked, cool on a wire rack and, if not eaten at once, store in an airtight container.

As is usual the recipe is taken exactly as written from the book – have you spotted the deliberate mistake? There are conflicting numbers of cookies – 15-20 in the heading and 20-25 in the final paragraph.

I'm not pointing this out to be mean spirited – in fact we all measure in different ways – I actually got 16 cookies from the recipe given.

There's just a little more …

Halloumi – seasoning and dips to go with


This is where you make it your own.

Seasonings and rubs can be whatever you want them to be and it might be a good idea initially to try a “ready to use” product – there are so many to choose from :

Hot and spicy
BBQ
Smokey steak
Cajun
Za'atar
Sumac
Ras el hanout
Jamaican Jerk
Chinese 5 Spice
Fajita
Spanish
Italian
Piri Piri

If you can't find a seasoning or rub that you like then make your own – a couple of ideas
are on their way.

Dips for me are equally if not more important and can depend entirely on your mood at the time. Will it be Thousand Island, sweet chilli, mayo, garlic and chive with lemon and sour cream, guacamole, hummous, salsa – a little bit of what you fancy does you good.

Anyway, enough waffling, here they are :


Interested – I was - it was definitely worth the experiment!

A bit of fun ...


...and a fab snack

This is not rocket science - just a bit of fun should you fancy a snack that won't take all day to produce and is delicious - here are halloumi fries which I know you can buy but you've still got to fry them in any event so why not have a go.

Basic recipe :
500g Halloumi cheese
85g plain flour
1 tbsp seasoning of your choice

vegetable or rapeseed oil for frying

Before you gasp in horror at the thought of deep frying – worry not – use a wok. I appreciate it's still frying but come on we all deserve a treat now and again.

I used a small wok 28cms in diameter. I used rapeseed oil (Canola USA) - just enough to cover the base of the wok - 13cms in diameter.

As a guide – 225g of Halloumi will give you 18 or so strips 1.5cms cut lengthways. For the coating, combine the flour and seasoning in a box with a lid – secure the lid and give it a good shake.

Once you have opened the cheese pat it dry with kitchen roll – cut into strips, pat again and then coat in the seasoned flour. Heat the oil to 190c – test with a small piece of bread. Fry in batches, turning, for 3 minutes, set aside and keep warm.

I think you'll like this – even if you're not that keen on squeaky cheese!

Pets – Hints and Tips


Take your egg whites from the freezer and fridge. On the day you're planning to create take them out of the fridge and to allow to reach room temperature. Here's the science bit – egg whites that have been frozen are better for meringues because the albumen has broken down.

Meringues cook differently depending on the oven used. An electric/fan oven gives dry heat and so cooks and dries out more quickly. A gas oven gives moist heat and so you'll need to cook the meringues longer.

I always use a glass mixing bowl when making meringues and although I think my bowl is squeaky clean I do agree with the lemon juice “wipe” mentioned.

This is hardly a complicated recipe but, if you're feeling inclined but not likely to have a go cos it's too much work – do your “mise en place” (weighing out) ahead – whenever you've five minutes.

Don't forget to “glue” your baking parchment with a blob of meringue in each corner – you'll be very pleased you did and your parchment won't be carried off by a sudden gust of wind and leave you – shall we say “cross”.

If you want to dry out your meringues so that they'll last longer and you're fortunate enough to have an Aga the warming oven is perfect. Not so posh – an airing cupboard is another perfect location for drying out meringues and for proving bread too. So much so that when we changed our system and the hot water tanks were removed from the airing cupboard I had a small radiator fitted and hey presto – my own kitchen extension!

Could I just point out – not wishing to be a spoilsport – that the pets may be fat free but they are definitely not sugar free.

I'm sorry we're coming to the end of the road testing – only one more pick to go - we'll just have to find another book to explore!