Time
is our greatest enemy – or rather lack of it - whether its a
commute, long hours, collecting and ferrying children there's very
little left to think about food and meals - here's my antidote which
does require some prep but it's well worth the effort.
The
basic raw slaw
It's much better to prep the slaw in separate food bags – it
lasts longer.
How much you prep is up to you – as a guide :
110g white or red cabbage, finely sliced – approximately
one third of a medium size cabbage – a “cheek”
use a paring knife – see hints and tips to follow
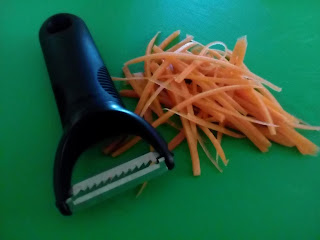
1 carrot – peeled and sliced with a
julienne peeler – see hints and tips to follow
1 spring onion – 15g finely sliced
salt and black pepper
Slice your cheek of cabbage as finely as you can using a sharp
paring knife – bag, clip and fridge.
Julienne your carrot – bag, clip and fridge.
Spring onions are mild, you could use a Spanish onion if you
prefer or a red version. You can get a sweet, mild variety too.
Slice, bag, clip and fridge.
The ingredients are deliberately bagged separately – they keep
fresh longer and carrots “bleed” into other veggies so unless you
love orange cabbage I'd definitely recommend!
If
you'd like to see a photo of “a cheek of cabbage” check out the
Veggie label Saturday 15th
April 2017 – The Coleslaw Conundrum – the raw slaw principle –
Coronation Slaw gives the photo.
There is an added advantage – if you like to eat sensibly say,
during your working week, then making up a batch of raw slaw will be
your best friend – so often we set out with the best of intentions
- it's not as easy as it sounds when you're hungry and your
resistance is low. The answer is to have your ingredients ready and
waiting to assemble quickly.
You don't have to use mayo - you can use any dressing that takes
your fancy with the cabbage, carrot and onion – last minute
additions of a handful of sultanas or raisins, nuts, or cubes of
apple would work well too.
If you want a dressing that is different and healthy too then have
a look at this :
Pomegranate
Dressing
2 tbsp pomegranate molasses
juice of two limes
2 tbsp sweet chilli sauce
pinch of nigella seeds
1-2 tsps sumac
Mix all the ingredients together, preferably in a jug then
pour into a clean jar (with a lid!) and shake well
Now for the rest of
the meal!


%20(1).JPG)
%20(1).JPG)
%20(1).JPG)
%20(1).JPG)
%20(1).JPG)
%20(1).JPG)
%20(2)%20(1).jpg)
%20(2)%20(1).jpg)
%20(1)%20(1).jpg)
.JPG)
.JPG)
.JPG)
.JPG)
.JPG)
%20(1).JPG)


.JPG)
%20(1).jpg)
%20(1).jpg)
.jpg)
.jpg)
.jpg)
.jpg)


.JPG)


%20(2)%20(1).jpg)