Saturday, 28 April 2018

Up to date cake!


Where there's a will there's a way - instead of boiling the oranges, microwave them for 8 minutes on high.

Pierce the oranges with a paring knife – carefully and microwave for 4 minutes then turn and repeat. Make sure your fruits are in a covered vented microwave container. Continue with the recipe marked * in My favourite cake.

A useful tip. Microwave the oranges ahead of making the cake so that they can cool, it will be much easier and safer to prep them, ready to pulverise.

This cake is moist – moist is good but, to use the northern vernacular, it can be “claggy”. I would, and do, make extra “drizzle” to serve with a lemon drizzle cake – here's an orange version that is perfect to serve with the Gateau a l'Orange.

Orange Drizzle

200g icing sugar
250ml orange juice – no bits

Put the sugar and orange juice in a small saucepan and heat gently so that the sugar dissolves. Bring to the boil and then reduce the heat and simmer on a low heat for 10 minutes.

Hey presto, a syrupy drizzle to dress your cake and you've turned a cake into a supper or dinner party dessert – serve with a spoonful of clotted cream or vanilla ice cream.

P.s. I've only ever heard the word “claggy” in the North West of the UK. To set the record straight it means “sticky” and apparently is Scandinavian in origin – you live and learn!

Photo guide up next.


My favourite cake …


from one of my favourite books. I would never describe myself as a baker but every now and again a recipe catches my eye. The following comes from The Book of Jewish Food by Claudia Roden. If you enjoy a book that gives you history as well as recipes then this is one for you. It's a vast tome, in excess of 500 pages!

Page 514 talks about oranges and page 515 gives you :

Gateau a l'Orange
(Orange Cake)
Serves 12

2 oranges
6 large eggs
250g sugar
2 tbsp orange blossom water
1 tsp baking powder
250g ground almonds

Wash the oranges and boil them whole for 1 – 1½ hours or until they are very soft.

Beat the eggs with the sugar. Add the orange blossom water, baking powder and almonds and mix well. *Cut open the oranges, remove the pips and purée in a food processor. Mix thoroughly with the egg and almond mixture and pour into a 23cm cake tin – lined with baking parchment, preferably non-stick and with a removable base. Bake in a pre-heated oven 170fan/190c/Gas 5 for an hour. Let it cool before turning out.

Believe me when I say that I stared at this recipe for years. What put me off baking this cake was the boiling of the oranges for the time allotted, an hour and a half is too long for me watching oranges and it's so easy to become distracted - before you know it you have a burnt saucepan and the rest, as they say, is history.

To bring it up to date … read on.

The best magazine photos


Set out your stall!


Makes life a lot easier.


A useful piece of kit for an even base.


Looking good.


Looking better still!

I'll report back on the frozen bars …


The best magazine … that's gratis and a grumpy old cook.


Most supermarkets have a give away magazine, usually monthly or seasonally. To the best of my knowledge there's only one supermarket in the UK that charges for the privilege and that is Sainsbury's. You can generally find something of interest in all of them but my award for the best is Waitrose Food (WF).

In the April edition – p111 – “The Sweet Spot” gives a recipe for Lemon curd crumble bars, described as a zesty, springtime treat from the WF test kitchen.

I suppose the recipe attracted my attention for two reasons, lemon and crumble – a perfect combination. I did what I always do, set my stall out and prepped all the ingredients so that I could get stuck in whenever I felt like it.

Here's the grumpy old cook bit. The recipe calls for a 325g jar of lemon curd. Oh goodie I thought - I was given a really posh organic lemon curd Waitrose Duchy Organic Sicilian Lemon Curd to be precise – I'll use that. When I took it from the pantry I was not impressed to read that it weighed only 320g. You may think I'm being picky – may be you're right – but if I'm “road testing” a recipe for the first time I follow it to the gram.

I then made matters worse and went on a “curd hunt” and pulled out Waitrose Orange Curd and M&S Sicilian Lemon Curd – guess what – they both weighed 325g.

I feel almost guilty criticising particularly since I think the WF mag is excellent. I realise that originally the “Duchy” label was acquired from The Duchy of Cornwall – in other words Prince Charles and I know that it supports The Prince's Charities. It may be that it goes with the territory but it makes no sense that you're selling what is now a Waitrose product that doesn't fit the WF recipe. Moan over!

I shall now “get a life” as they say! Here are my notes – try making your lemon curd in the microwave – it's faster – check out Saturday 11th February 2017 – Sweet week – The lemon curd dilemma for the recipe.

I have frozen the bars – watch this space to see what happens.

I served the bars as a dessert, warmed with home-made ice cream – went down a storm!

P.s. If you're not able to pick up a copy of the magazine check out www.eatyourbooks.com and check out Waitrose Food Magazine April 2017 for the recipe.

Photos coming up - see if you're tempted.


Sunday, 22 April 2018

Gallimaufry photos


The comments :

I love chicken served this way, tender small slices of breast and the gravy is delicious”.

It matters not whether it's broth, gravy, jus, or sauce – so long as it takes good – it's whatever floats your gravy boat – that is beyond bad – I apologise.


Gallimaufry – Hints and Tips


First up, the potatoes. You'll notice that the recipe calls for red new potatoes. Have a look for “Albert Bartlett Apache potatoes – great for roasting or mashing in their skins”. I've found them in 600g bags. The majority of the larger supermarkets carry more varieties these days - another example is Ruby Gem, found at Waitrose.

Next the tapenade. You can do whatever is more practical – I always have a jar of black olive tapenade in my store cupboard and my favourite is M&S Black Olive Tapenade – it also has an excellent best before date. If you're feeling adventurous have a go at making your own. It's easy.

Coarse Tapenade

1 tbsp drained capers
85g pitted olives
1 tbsp olive oil
Two anchovies, chopped finely
1 roasted garlic clove
1 dessert spoon of lemon juice

Blitz all the ingredients. The trick is to stop pulverising whilst the mixture is coarse – it gives texture to the dish and not mush.

Then there's the stock. You can thicken it if you wish – as it is it's more of a broth. If you are a “gravy” person and prefer a little more substance then mix 1 tsp of cornflour with a drop or two of water and add gradually to the stock as you're warming it through. Note to self – don't be tempted to add anything else – whether to the stock or to the gravy – your stock is already infused with garlic and oregano, not for nothing do I call it liquid gold.

Here's another idea. This recipe makes me think of the perfect supper for a duvet/box set day. How romantic to make one huge plate to share … I'll leave that with you.

Finally – you still have two chicken legs, wings etc., leftover from the slow cooking. Strip the legs and wings of meat, bag and freeze – don't forget to mark the bag. Use the chicken in cooked pasta with Alfredo Sauce or as part of a mid week frittata or last but by no means least you have your protein element for your chicken salad wrap – with mango or raita dressing for lunch the next day – there will probably be enough chicken for two wraps – just in case you're feeling generous. If you have time then tip the remaining chicken bits into a large saucepan, cover with water – bring to the boil and simmer for 20-30 minutes strain and boom – chicken stock. Freeze it in small amounts – you'll be pleased you did. If you are short of time then bag the remains and freeze it for making stock for soup whenever the mood takes.

Food for thought – I hope!

Chicken Gallimaufry


Chicken Gallimaufry
Serves 2

2 chicken breasts, sliced at an angle

2 tbsp rapeseed oil
350g red new potatoes, halved or quartered
should be 2cm ish.
Half a lemon cut in half
135g baby leeks, topped, tailed and cut into 1.5cm pieces
1 tbsp tapenade - 15ml
110g fine asparagus
Salt and pepper
Chopped flat leaf parsley to garnish


Pre-heat oven 200fan/220c/Gas 7.

Put the potatoes and lemon wedges into the foil tray you set aside after the slow cooking (or a medium roasting tin if you prefer) and toss with 1 tbsp of oil, season and roast for 20 minutes.

Turn down the oven to 180fan/200c/Gas 6.

Snap the asparagus to remove the woody ends – they should be of a similar size - then blanch, plunge into ice cold water and pat dry. You can prep ahead if you wish, then box and fridge.

Toss the leeks in the remaining tbsp of oil and add to the potatoes. Add the tapenade and fold through. Bake for 10 minutes then add the blanched asparagus for 5 minutes, fold in gently.

Whilst the potatoes et al are baking warm the stock – you should get 250ml from your chicken after straining.

To assemble, divide the potatoes, leeks and asparagus between two large bowls – plates will do. Top with the sliced chicken breast – one breast per serving - and add a liberal drizzle of the stock. A sprinkle of parsley to garnish and a wedge of lemon too.

Chicken gallimaufry – or a warm chicken salad, whichever you prefer.

Photos on the way!

Spring has sprung …


we hope! It is supposed to imply that it has stopped snowing, it's getting warmer, the blossom is out – renewed hope and all that. After the wettest Easter for a long time you wouldn't hold your breath just yet!

We have to start somewhere so here goes - what's your opinion on salad? For people of a certain age the word “salad” is the stuff of nightmares and conjures up visions of limp lettuce leaves, a slice of boiled egg, ditto tomato and a spring onion – oh and if you're lucky salad cream too.

I have decided to make a salad seem more interesting - our next foray will be revisiting warm salads – I know that's a contradiction since salad is meant to be a cold dish – as I'm very fond of saying, “rules are made to be broken”. Henceforth my more interesting name for a warm salad is a “gallimaufry”. I already have a series of “ hodgepodge” dessert recipes on the blog - both words mean jumble or a medley if you prefer – we now have gallimaufry for the savoury and hodgepodge for the sweet.

First up is Chicken Gallimaufry but, before we get to chapter and verse - you know I'm always extolling the virtues of slow cooking and in particular slow cooking a whole chicken – you'll need one for the following dish. Check out the chicken label on the blog and then “Slow, strip, strain and stock for the recipe – it will take you all of 5 minutes to prepare and then it's left to its own devices for 8 hours.

You can slow cook the chicken ahead to suit your own schedule.

There are two important elements though that need attention – when your chicken is cooked remove it from the cooker and place it in a foil tray measuring 24x24cms - with sides, to cool. Strain the stock through a sieve into a jug, allow to cool, then cover and fridge.

If you have fingers that are impervious to heat then take both breasts off the bone, cool, wrap or box and then fridge. Wrap, box and fridge the remaining chicken – don't discard the foil tray or the remnants of stock left behind – it's a perfect roasting tin.

All over bar the shouting as they say, recipe up next.

Sunday, 15 April 2018

Perfect pastry for pies


A quick question – do you buy ready-made pies for emergencies and are constantly disappointed? One thing is for sure they are not cheap so if you finish up with only half a filling and the remainder is fresh air it's not good. That's why I make my own – it doesn't have to take forever – it's not a competition and you don't have to go learn the art of pastry making – cheat, buy the sheets – either puff or shortcrust – make it easy on yourself!

If you feel brave you could have a go at batch cooking and freezing your own pies – there's every shape and size of foil pie dishes known to man to suit everyone – single deep dishes, shallow versions and larger too. Equally there's the same choice of enamel pie dishes too or ceramic if you prefer. The world is your lobster – you can spend very little or mega bucks. Personally I find that foil is convenient and doesn't take up too much space in my freezer although I do get that you wouldn't want to serve a glorious pie for a supper/dinner party in a foil tray so may be treat yourself for special occasions.

If you wanted to try making your own pastry you could do a lot worse than making a pie with wholemeal pastry. I can definitely confirm that the recipe I use is kind and does everything it should and more. It freezes very well.

Wholemeal pastry doesn't generally get a great reaction – I think it goes way back to when you could use it for crazy paving! Here's an extract from a message my friend and student M sent me after a recent class :

“… M has had her mind corrected on the wholemeal pastry, the Homity Pie made a lovely lunch next day. The wholemeal pastry that I had previously was dry and crumbly but this was delicious ...”

What does make a difference is the quality of the flour – I use Doves Farm Organic – I'm sure there are others, it's just a guide.

Wholemeal Pastry

200g plain wholemeal flour
100g unsalted butter
pinch of baking powder

ice cold water to bind

Rub the butter into the flour and baking powder until it resembles breadcrumbs, then gradually add a glug of water and use a round bladed knife to bring the pastry together.

You can use a processor to reach the breadcrumb stage if you prefer – I'd then tip the pastry into a mixing bowl and add the water by hand. Rest the pastry in the fridge for 30 minutes.

Using the Rummage Pie recipe as a template, line, fill and top your pie dish but don't egg wash - freeze. (By the way you can freeze ready-made pastry sheets in pies if they have come from your fridge, in other words “chilled”). Double wrap in foil. You can cook straight from your freezer, egg wash and then bake in a pre-heated oven 180fan/200c/Gas 6 for 40 minutes – turn after 20 minutes and check after 35 – ovens vary.
The cooked Rummage Pie freezes perfectly if you've any leftovers. Freeze in portions to suit. I normally take the pie from the freezer and fridge in the morning to re-heat as above for 20 minutes.

Live dangerously – give it a go and think how virtuous you'll feel when serving up your own comfort food.


Rummage pie – photo guide


I know I shouldn't blow my own trumpet but it tasted as good as it looked.


What's not to love.

P.s. If you wanted an alternative pie filling and have been stashing leftovers in your freezer mix 150g each of cooked gammon and chicken and add either a sauce supreme if you've got the time or an Alfredo sauce if you haven't.


Reprise of the rummage!


Here we go again, two three four.

We all get to a point where there is nothing left in the tank and totally devoid of any inspiration I suppose it'll have to be egg and chips – that great Northern stop-gap – joking aside, with fresh crusty bread liberally spread with good butter, there's nothing better.

Moving on, such was my predicament this week. Usually my routine is to take a minute – no more – to decide what's for supper and if appropriate take it out of the freezer. Not today, not a clue.

When all else fails to clear my head I either go for a run or go to Pilates. It's Pilates today and walking from the car park – still nothing.

Then I remembered I'd got a shortcrust pastry sheet in the fridge. It's a start. An odd onion here and the remnants of cheese I've always got in my fridge - the usual suspects are Gruyere, Mature Cheddar and Red Leicester and I think we're getting there. I can't say I've favoured shortcrust pastry for pies, I automatically use puff. You know what they say “a change is as good as a rest”.

Hmm I know this is probably sounding predictable and you'd be right. Experience has taught me that when it's a horrible grey and cool day there's nothing like a pie, especially when it's cheating using a ready-made sheet and easy - whether it's with shortcrust or puff.

Here's my thrown together recipe :

Rummage Pie – Serves 4

300g grated hard cheese, mixed – whatever
is in your fridge – 125g Mature Cheddar, 125g Red
Leicester and 50g Gruyere
1 medium onion, finely diced and softened
with a knob of unsalted butter until opaque
1 tsp Dijon mustard
4 medium jacked potatoes, baked, peeled and
cut into small cubes
black pepper
1 shortcrust pastry sheet – 320g
1 egg, beaten

To assemble :

Make sure you take your pastry out of the fridge to allow it to “warm up” - you'll find the pastry is easier to use and won't crack. Line your pie dish with half the sheet – you may need to roll it a little to fit – for guidance my pie dish measured 27x9x5 cms approximately.

Tip the cubed potatoes into a large mixing bowl, season with black pepper. Add the mustard to the softened onion and then mix with the potatoes. Add the grated cheese and your filling is ready for the pie dish. Add your pastry lid, egg wash and fridge until you're ready to bake. Don't discard the beaten egg. Pre-heat your oven 180fan/200c/Gas6, egg wash the pie again and bake for 30 minutes until golden brown.
I apologise unreservedly to the shortcrust pastry sheet – it made an excellent change and I'll definitely use it again.

Note to self – add to list of freezer emergency kit!

Photo guide up next.


A Spring treat


Last September we talked a lot about the Autumn fruit harvest – in my case damsons. From that harvest came damson vodka. You don't need an Autumn harvest to make a fruit vodka. If you're interested check out the vodka label on the blog – it gives you complete recipes for the roasted damsons to the vodka and a recipe using frozen fruit too.

Leave your liqueur alone for three months if you can – you'll be glad you gave it a chance to mature a little – the longer the better.

I said back then – purely in the interests of quality control you understand - that there will be a tasting later on in the year and full and frank feedback given! In one word – wow – in another - it certainly hits the spot – take it easy!


They look pretty, me thinks – a nice idea for a gift.

If “shots” are your thing then enjoy neat!

If they aren't then have a shot on the side of a dessert indulgence of your choice.

Tip a shot of the cherry liqueur over frozen cherries and serve with ice cream.

Thank you Rockwright!


Saturday, 7 April 2018

Comfort photos!


Here's another thought – if you have dinner guests who have hearty appetites you could transfer a portion of the Alfredo with a Parmesan dumpling into a individual pot complete with lid – serve as a starter but bear in mind your main should balance.

Trust me if you want comfort food look no further but a word of warning – these comfort food ideas are not for the calorie conscious nor meant for everyday more healthy eating. Perfect however for a weekend treat and hey rules are meant to be broken!


Two for the price of one …


the dumplings to go with the steak and gravy, or

... a recipe for a veggie bowlful requiring only a spoon and a boxed set!

Either way ideal if you're in the mood to put your feet up and relax. I love minimum effort that gives maximum deliciousness.

Here's the dumpling recipe :
Parmesan Dumplings

In a large bowl, mix together
100g (4oz) self raising flour
50g (2oz) vegetarian suet
pinch of salt
15g grated Parmesan cheese

add 5 tbsps of ice cold water – 100ml approx
enough to give a
firm but pliable dough. Divide into 8 dumplings – 6 if
you'd like big ones!

30g grated Parmesan cheese to garnish

Pre-heat oven 180fan/200c/Gas 6.

Add the dumplings to the steak and gravy and sprinkle the 30g of parmesan cheese over the dumplings and cook for 30 minutes.

Serve in a warmed bowl. For extra decadence if you've got leftover mashed potato in the fridge, warm it through place in warmed bowl, place steak on top with a generous helping of gravy, add a dumpling – or even two.

You can cater for the veggies too.

Baked Mushrooms in Alfredo Sauce
Serves 2

500g chestnut or portabellini mushrooms -
quartered

Place the mushrooms on a baking tray that has sides and bake in a pre-heated oven 180fan/200c/Gas 6 for 10 minutes so that the mushrooms release their liquor – drain and set aside.

Place the mushrooms in a small casserole dish measuring 7x24x5 cms ish. Pour over a batch of Alfredo Sauce – see “The hot idea” for the recipe. Place the dumplings into the mushrooms and sauce. Sprnkle with the remaining Parmesan, cover with large pieces of pleated foil and bake in a pre-heated oven as before, for 30 minutes and piping hot.

Photo proof up next!

Stew and Dumplings …


actually it's slow cooked shin beef steaks with Parmesan dumplings.

Shin beef used to be considered an old fashioned cut of meat – it has become more fashionable of late. It is perfect for slow cooking – it has connective tissue which is broken down over a long cooking time resulting in tender meat, full of flavour.

The weather is messing with everyone at the moment – Easter has just been and gone and it hasn't exactly been kind - we are still walking round wearing sweaters and two pairs of socks and so not in the mood to surrender our comfort food yet awhile.

I hope, in the nicest way, that what follows is my last “comfort” recipe for some while :

Steak, Gravy and Parmesan Dumplings

Serves 4

1kg shin beef – cut into thick steaks
glug of rapeseed oil
2 cloves of roasted garlic
500g Passata
1 tbsp tomato paste
2tsps soft light brown sugar
2 tbsps soy sauce
250ml red wine – I used Chianti
300ml water
2 beef stock pots
salt and black pepper

Using a large frying pan heat the rapeseed oil and seal the steaks on both sides, seasoning with salt and black pepper. Set the steaks aside in the slow cooker.

Add the garlic, tomato paste, sugar, soy and stock pots and fry gently so that the tomato paste is cooked out and the stock pots melted combining all the ingredients. Add the red wine and bring to the boil then reduce to a simmer, add the water and the passata bring back to the boil then tip over the steaks in the slow cooker. Cook for 4-6 hours on low.

You don't have to do anything with the steak and gravy, if you leave it overnight – covered of course - in a cool place all that will happen is that the flavours have time to develop and it'll taste even better.

The perfect supper to make ahead.

Dumplings up next!


Assembly photos


Serve with the halloumi fries – see “Halloumi – seasoning and dips to go with” for photos and if you'd like the recipe, see “A bit of fun”.

Here's the slaw base, ready to add whatever dressing you desire!


My best effort yet in my veggie burger quest.

Sunday, 1 April 2018

Then there's the slaw …


I realise I've mentioned slaw more than once but it does not harm to refresh a good idea especially when it's to go with your bazzin' burger and relish – all your own work.


The raw slaw

110g white cabbage, finely shredded – approximately
one third of a medium size cabbage

1 carrot – peeled and shredded with a
julienne peeler

1 spring onion – 15g finely sliced
or a finely sliced sweet variety of onion

First up shred a “cheek” of cabbage – a sharp paring knife is the best piece of kit – smaller and easier to control – with care! Bag, clip and fridge.

The julienne peeler is an essential piece of kit - every serious cook should have one - without being ridiculous try and keep your slaw to a similar size. Keep in mind carrots bleed especially if you decide to grate them – good luck clearing up having pebble dashed every nook and cranny in your kitchen – grated carrot flies everywhere, it's impossible to control. Bag, clip and fridge separately.

Bag, clip and fridge the onion – I'd double wrap it to prevent it tainting.

There is another speedier option – you can buy bags of coleslaw mix – in theory ready to use. The downside is that this product is mass produced so you may get larger pieces of cabbage, however it's nothing a chefs knife can't put right – tip it onto a chopping board and refine! The upside is it's practical and if you want to road test creating your own slaw it's worth a shot.

The recipe given will give you a box of slaw – measuring approximately 11cms x 6.5cms x 5cms. One box lasted me a week, a spoonful here and a spoonful there – you'd be surprised how well it fits as a side to lots of main dishes or – dare I say it – even another burger!

Here's what the cabbage should look like together with the julienne cutter and carrots :


I'm sure by now you're thinking that this might be a step too far just for slaw but can only say that I find the convenience of being able to grab a handful of ingredients and add a dressing of my choice extremely virtuous not to mention healthy – well may be depending on the dressing.

It's a bit like the beetroot relish – it may not be the most complicated stuff but it's your own, designed to your taste.

More photos next.

The burger – assembly


A very serious business!

You'll need brioche buns – either lightly toasted or split and warmed in the oven.

For those who are watching their waistlines – really – or have suddenly decided not to eat bread the fashion is to serve the burger on a bed of lettuce – Little Gem lettuce cups would do nicely for this purpose.

Spread the relish – generously - on the base of the bun or spoon into the lettuce cups,

Place the burger on top of the relish, add a cheese slice, an onion ring or steeped sweet raw onion and add the “hat”.

I'd serve the burger with the Halloumi fries and a slaw.

You could use shop bought onion rings or, if you like the idea of a quick version of “pickled onions” I've mentioned in the past steeping onions in sweetened vinegar, here's a reminder :

225g/8oz demerara sugar
600ml/1 pint malt vinegar
15g/½oz pickling spice
or 1 pint of ready spiced pickling vinegar


Dissolve the sugar in the vinegar over a low heat, bring slowly to the boil and boil for a few seconds.

Leave to cool and then bottle in jars that have been sterilised - I use the dishwasher.

Slice an onion thinly and submerge it in the spiced vinegar. Leave it for a few hours or overnight – preferably not in your fridge – you'll taint everything.

Help with the raw slaw is coming next but whilst I think it would be perfect dressed with the recipe below which we used in the tandoori chicken tikka salad :

The dressing

4 tbsps extra virgin olive oil
1½ tbsps balsamic vinegar
1½ tsps brown sugar
¼ tsp coarse black pepper
¼ tsp cumin powder
pinch of salt

Whisk together all the dressing ingredients and decant into a screw top jar – easier to shake when ready for use.

Ready for the slaw!

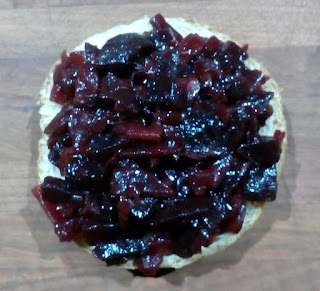
Bazzin' beetroot relish


I'm continuing with “bazzin'” since the relish is just that. It's definitely a relish and not a chutney since it contains vegetables and fruit - chutney is made from fruit and additional spices et al.

It may not be the most sophisticated relish but then it doesn't mean to be – it's your own and really quick and easy to make.

Bazzin' beetroot relish

300g vac pack of organic cooked beetroot
drained and cut into small cubes
1 sharp eating apple, peeled, cored and cut
into small cubes
1 medium onion, finely chopped
75g soft dark brown sugar
1 tbsp balsamic vinegar
1 tbsp olive oil
salt and black pepper

Don't forget to use gloves when prepping your beetroot!

Mix well and place all the ingredients in a medium saucepan – 16cms in diameter. Simmer on a low heat, uncovered, for 30 minutes, stirring occasionally until all the liquid has been absorbed.

Take the pan off the heat and allow to cool. Box up and fridge until ready to use.

This is an important element of my burger construction – I sampled the relish with supper – I should not be saying it was bazzin' but, in the interests of quality control, someone has to do the job and it was!

What I loved about this recipe is its usefulness – anywhere you want a relish it fits the bill - as a side with baked salmon or honey glazed gammon to plain and simple with bread and cheese.

Give it a go, you won't be sorry!


Bazzin' Burgers


Speaking of feet up in front of a box set, here's another contender – the bazzin' burger.

For those not familiar with the word “bazzin'” I should explain that it's a slang word for excellent, great and/or fantastic, used in the Midlands and in the North West of the UK.

Entirely appropriate for the following recipe – it sounds so much better than “veggie burger”!

Bazzin' Burgers

4 sweet potatoes – 700g ish
400g tin chickpeas, drained and rinsed
(240g drained weight)
2 tbsp chickpea flour (gram)
1 tsp ground cumin
1 tsp ground coriander
2 tsp sweet smoked paprika
grated zest and juice of a lemon
or 2 tbsp lemon juice

75g grated Parmesan
150g Panko crumbs
black pepper

Rapeseed oil for shallow frying

Pre-heat oven 180fan/200c/Gas 6

Bake the sweet potato (pricked and wrapped in foil) for an hour then check – may need longer depending on size of potatoes. Cool, then snip the end, cut along the length and the skin peels away. Let them cool.

Blitz the chick peas – you want texture, not dust – see below about shucking!

Mix the potatoes, chick peas, gram flour, spices and lemon juice.

You'll get 8 quarter pounders [4oz or 110/120g]. Roll between your hands into a ball and then flatten to form into a burger shape. You may need a dusting of plain flour to prevent sticking.

Mix the Parmesan, panko and black pepper together then coat each burger.

Shallow fry the burgers on a medium heat in rapeseed oil, sealing on both sides so that they are golden and crisp – 2/3 minutes on each side – reduce the heat to low and fry gently for a further 10 minutes or so, turning or you can set aside having sealed the burgers on both sides then cool, cover and fridge until required. Pre-heat your oven as above and pop the burgers on a baking tray and re-heat for 15 minutes.

The shucking stuff

Before you blitz your chick peas you might like to remove their outer husk. It's not compulsory but they can be tough. Tip them onto a shallow tray lined with kitchen roll. Add another layer of kitchen roll and move the kitchen roll using the flat of your hands for 30 seconds. Lift the kitchen roll and you'll see the outer husk of the chick pea comes away. You don't have to do this if you don't mind the husks – I think it's worth the effort and you can shuck whenever you have five minutes. This is all stuff that you can prep when it suits you.

That's the boring bit out of the way – a relish to go with and the all important assembly coming next.