Back
to the warm salads …
This
“salad” is excellent hot or cold and is a great idea to include
as part of a mezze or thali as they say in India!
It
stands perfectly well on its own but better still as part of a party
table. It's convenient in that you can marinade overnight and just
pop into the oven when you're ready.
Tandoori
chicken tikka salad
Serves
4
700g (1lb 8oz) chicken breast, cut
into chunks
Marinade
1½ tbsps ginger and garlic paste
½ tsp salt
1½ tsps green chilli paste
2½ tbsps white vinegar
5 tbsps vegetable oil
1½ tsps turmeric
1½ tsps red chilli powder
1½ tsps cumin powder
2 tsps garam masala
160g (5½ oz) Greek yoghurt
or low fat version
For
the dressing
4 tbsps extra virgin olive oil
1½ tbsps balsamic vinegar
1½ tsps brown sugar
¼ tsp coarse black pepper
¼ tsp cumin powder
pinch of salt
In a bowl mix the chicken pieces with the ginger and garlic
paste, salt, green chilli paste and the white vinegar and leave to
one side.
In a separate mixing bowl, whisk the oil and turmeric. Add the
red chilli powder, cumin poweder and garam masala to the bowl then
mix well before adding the yoghurt. Combine the mixture thoroughly.
Add the chicken pieces to the yoghurt mixture. Use your hands
to ensure the chicken pieces are evenly coated in the yoghurt
marinade. Leave the chicken to marinade for at least an hour. You
can leave it in the marinade overnight, this way the chicken will
absorb all the flavours thoroughly.
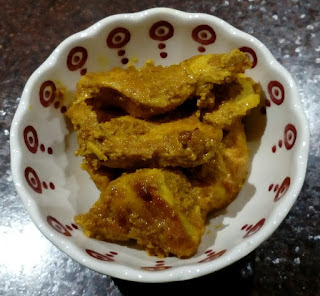
Once the chicken has been marinated, place the pieces on an
oven tray. Cook in a pre-heated oven at 160fan/180c/Gas 4 for 20-25
minutes.
If
you prefer a vegetarian or vegan version you can use Quorn
pieces.
You'll not be disappointed!
A
step by step chicken tikka guide
The
colours are vibrant and stunning – just as they should be.
What's
your salad bag?
For this dish mine was a forage in the fridge and I rescued :
Half a bag of baby new potatoes
(if you can get Cornish so much the better)
cooked, peeled and then cubed – approximately
8 potatoes
Iceberg lettuce – broked into small pieces
small sweet mixed peppers, de-seeded and sliced
finely
cherry tomatoes, halved
one medium sweet variety onion, sliced
finely
I chose a large white bowl for the salad and began with the
lettuce and then sprinkled the remaining salad ingredients, topping
with the chicken pieces and finally drizzling with the dressing.
Think about scaling up your salad - as it is it's a lunch and in
particular easy to transport so would be great if you're on the move
or just to take to the office.
Add more ingredients to the salad and serve with a flat bread of
your choice for a supper – you don't have to make them if it's too
much pressure!
Step
by step salad photos
Experiment
with colours – have a look at the small sweet peppers!
Now
it's complete with the dressing drizzled!
Now
it's looking even better - there are some dishes that just scream
“eat me I'm delicious!”
The
dressing … to go with the chicken salad
Who
would have thought you'd be drizzling a quintessential Italian
combination of extra virgin olive oil and balsamic vinegar – a
marriage we already know is made in heaven – with another Indian
classic – tandoori chicken tikka.
The
dressing
4 tbsps extra virgin olive oil
1½ tbsps balsamic vinegar
1½ tsps brown sugar
¼ tsp coarse black pepper
¼ tsp cumin powder
pinch of salt
Whilst the chicken is cooking, with a whisk mix together all
the dressing ingredients and leave to one side.
A few thoughts so far :
I'd wear gloves when you coat the chicken – turmeric and chilli
will stain your hands as well as equipment.
Make sure your “oven tray” has sides – unless you have a
burning desire to clean your oven!
I used soft dark muscovado sugar in the dressing.
I marinaded the chicken from 11am – 7.30pm. It's very important
that you cover the chicken marinade and keep it in a cold place. If
you keep it in your fridge then bear in mind it's raw chicken and as
such should be kept on the bottom shelf and more importantly that it
is kept away from cooked food.
When the chicken is cooked I know you'll want to taste it –
cook's privilege after all – a lot depends on your palate and that
of your guests but tasted on its own you may find it a tad hot. I'd
suggest that before you rush to judgement wait until you've assembled
and tasted the completed salad.
A word about the “heat” of the spices. Remember recipes are
meant to be a guide they are not set in stone. If you find the
spices too powerful don't let it put you off – try reducing the
green chilli paste, turmeric and red chilli powder from 1½ tsps to 1
tsp each.
It's personal taste after all – it's whatever suits you.
More
salady ideas to come!
%20(2).JPG)
%20(2).JPG)
%20(2).JPG)
%20(2).JPG)
.JPG)
.JPG)
.JPG)
.JPG)
.JPG)
.JPG)
.JPG)
.JPG)
.JPG)
.JPG)
.JPG)
.JPG)
.JPG)


.JPG)