Saturday, 5 February 2022

Editor's February Pick #4: Chocolate Bark

Editor's note: Whilst we're talking about sweet treats it's time to take it up a notch with this next piece. If you're entertaining this has that wow factor that will enhance any table. It's along similar lines to the Rocky Road recipe but don't be deceived. Either zhuzhing a pudding. eating on its own or with some ice cream (see above!) it will go with everything and even makes me look like I know what I'm doing. At least it did until I got sous and Sioux mixed up and apparently it wasn't appropriate kitchen attire. The jokes aren't the best, so sous me - sorry!


A little bit of what you fancy …

does you good – that's my excuse!

Here goes :

Chocolate Bark

420g

You'll need :


A baking tray 32x22cms – 12½”x 8½” approximately in old money! You'll also need a drop of oil to wipe onto the tray and a sheet of cling film.

A handful each of the salted caramel fudge pieces, honeycomb and mini marshmallows. It occurs to me that a handful really depends on the size of your hand, to be more specific, 60g of the fudge and 30g each of the honeycomb and marshmallows.

Line the baking sheet with cling film. You will find the cling film easier to control if you oil the baking sheet first.

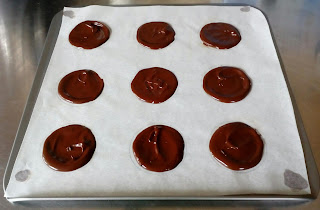
Break 300g of dark or milk chocolate into pieces and put in a bowl over a pan of barely simmering water and melt. You choose the balance of dark and milk – I used 200g dark and 100g of milk chocolate. You need to bear in mind you're adding sweet elements and so more dark will give you a better balance but not too bitter.

When the chocolate has melted pour it onto the cling filmed sheet.

Scatter the fudge, honeycomb and marshmallows randomly over the chocolate. Wearing a disposable glove use the flat of your hand to press your scatterings into the melted chocolate. Do not panic, it will stick to the glove but will lift the chocolate and create a drizzled effect.

Leave to set for 4 hours before breaking into chards. You can snap it into irregular pieces or cut it using a chef's knife.

I realise that this “treat” is definitely not healthy, nor is it meant to be consumed in large quantities – sometimes a little bit of what you fancy does you good – keep it fridged and that way you have to work harder to enjoy it. You could offset the unhealthy with a handful of finely chopped nuts of your choice and/or chopped fruit – apricots work very well with dark chocolate.

Photos up next …


Editor's February Pick #3: Easter Rocks AKA Rocky Roads

Editor's note: Last week, one of the recommendations was the piece about the chocolate melting pot, and using that to make dairy-free chocolate more interesting. So to go along with that, I (re-)present the MiamMiam Rocky Roads. Combine this with the chocolate pot, maybe even splodge some peanut butter in there too and you are in for a real treat. The hobnobs absolutely make this for me, there's a reason that the instructions are to "roll" the rolling pin, not use it as a weapon and bash away. Tried it, the bag split. So definitely roll!


Easter rocks!

I realise that this is not a traditional Easter Egg but hey does it really matter so long as it's chocolate?! What I love about this treat is it's easy and makes heaps so whilst it sounds like it could be expensive if you've lots of treats to give then you'll find it's great value too.


Rocky Road


250g dark chocolate

150g milk chocolate

175g soft butter, unsalted

4 x 15ml tbsp golden syrup

200g hobnobs


*150g shelled Brazil nuts

*150g red glace cherries

*125g mini marshmallows


Put the biscuits into a freezer bag and roll with a rolling pin until you get a mixture of rubble.

Chop the Brazil nuts into different sizes.

Chop both sorts of chocolate into small pieces, or use chocolate buttons made for melting and then put them into a heavy-based saucepan to melt with the butter and syrup over a gentle heat.

Take the pan off the heat and add the biscuit and nuts, cherries and mini marshmallows. Turn carefully so that all the ingredients are coated with the syrupy chocolate.

Tip into a foil try (I use a tray bake size), smoothing the top as best you can, although it is meant to be uneven.

Refrigerate until firm enough to cut, which will take about 1½-2 hours. Take the set block out of the tray. With the long side in front of you cut 6 slices down and 4 across so that you have 24 squares.

This is the basic Rocky Road recipe. The three ingredients marked “*” can be swapped to suit your own personal taste. You can choose any of the ingredients given on your “Design your own Rocky Road” sheet attached.

Make ahead tip:

Make the Rocky Road and refrigerate to set, cut into bars or bite size pieces and then store in an airtight container in a cool place for up to 1 week.

Freeze for up to 1 month.


Editor's February Pick #2: Granola Gravel Accompaniment

Editor's note: Once again, my original plan has been lost as I carried on scrolling and found the accompanying piece to go with the Granola Gravel. The best finds are the ones you're not looking for and this is a fantastic recipe for a faff-free ice cream - all the more so because at my local B&M, I've recently discovered vegan condensed milk. Now with most things I buy on impulse, I think "Hurray!" and then later "What the hell do I do with it". So this is very fortuitous and I see some ice cream in my near future! PS, this - 1.6 litres equaling 18 scoops - isn't a serving suggestion. I must not eat 18 scoops in one go. In other news, Amazon does sell Rennies. 


Granola Gravel … nil desperandum

For those who aren't familiar - “never say die”

I'm going to make a batch of vanilla ice cream, cut the gravel into smaller pieces and fold it through to make a Granola GlacĂ© – ta dah!

The transformation :


A quick recap of the recipe :


Vanilla ice cream


Prep – 5 minutes

Total time – 5 minutes

plus freezing at least 6-8 hours

or until firm


Gives you 1.6 litres of ice cream is equal

to 18 scoops


1 x 397g tin sweetened condensed milk

1 x 600ml double cream

2tsp vanilla bean paste


  1. Put the condensed milk, cream and vanilla into a large mixing bowl and beat with an electric hand whisk until the mixture is quite thick and stiff, like pipeable whipped cream.**

  1. Spoon the mixture into a lidded freezer-proof container and free for at least 6-8 hours or until firm.


** My variation – make a batch of sticky toffee sauce and fold 260g through the ice cream. For the sticky toffee sauce recipe see Sauce label – The ultimate … sticky toffee sauce. You can buy a ready-made version but it's nowhere near as good!


Editor's February Pick #1: Nothing Ventured ... Granola Gravel

Editor's note: For the first editor's pick of the month I was going to lead on from the previous selection but got completely derailed, you'll see why. There is a plethora of sweets on the blog - to get started you've just got to head to the dessert or sweet treat categories. I went on a 'web walk' and got lost amongst some amazing ideas so my original plan went out the window and I'd like to highlight Granola Gravel. I am a huge fan of oats in most things but especially desserts so this is a recipe I was very happy to rediscover. A perfect variation on a theme - have a look at the photos from the accompanying guide at the bottom, so good - cherries and all!


Nothing ventured … nothing gained

Okey dokey, lets get this show on the road, here's my Granola Gravel – Take 1 recipe :


Granola Gravel – Take 1


250g dark chocolate

150g M&M's hazelnut spread

175g soft butter, unsalted

4 x 15ml tbsp golden syrup

350g Granola – mixed sizes

200g glacé cherries


Put the granola into a freezer bag and bash gently with a rolling pin so that you get different sizes.

Break the dark chocolate into small pieces, or use chocolate buttons made for melting and tip them into a heavy-based saucepan to melt with the M&M's spread, butter and syrup over a low heat.

Take the pan off the heat and add the granola and cherries. Turn the mixture carefully so that all the ingredients are coated with the syrupy chocolate.

Tip into a foil tray (I use a tray bake size – 31cms x 8.5cms x 3cms or 12” x 17½” x 1¼” in old money ) smoothing the top as best you can, although it is not meant to be perfectly flat.

Fridge until firm enough to cut, which will take about 3 hours. Take the set block out of the tray. With the long side in front of you cut it into half – set one aside. Slice 6 slices down and 4 across so that you have 24 squares – this will give you a good sized cube – cut smaller if you prefer which will obviously give you more. Repeat with the remaining half.

Freeze for up to 1 month.

If it lasts that long!

Check out the before and after:


Saturday, 29 January 2022

Editor's January Pick #20: Here goes nothing with the chocolate pot!

Editor's note: Personally, I don't drink or cook with milk anymore but that doesn't mean I don't still get chocolate cravings - every nine seconds if I'm honest. But milk-free chocolate is usually either horrid, boring, uninspiring or all of the above. Reading the second part of the chocolate melting pot review, I'm inspired to borrow the melting pot and have a go at zhuzhing up some milk-free chocolate with a big fat tub of peanut butter. Watch out Reeces! Or there may be a better idea...


Here goes nothing!

The instructions are straight forward and the base unit easy to understand. You preheat the base unit with a melting pot inside for 10 minutes, then add the chocolate, stirring occasionally until melted :


Remove the melting pot from the base and pour a small blob of melted chocolate onto each circle on the parchment :


Using the back of a spoon – I used a dessert spoon – in a circular motion gently ease the melted chocolate out to fill the circle :


Do not panic if you overrun the circle – it's not the end of the world – practice makes perfect, it's like using a piping bag for the first time – give yourself a break.


Editor's January Pick #19: New piece of kit

Editor's note: There are a lot of different topics covered by MiamMiam but one of my favourites is the kitchen kit section. Being a very rudimentary cook myself as in sauce pan, frying pan, oven and done - (not Bear Grylls up a mountain with a twig and a sock type stuff) it is fab to read about accoutrements that I wouldn't normally be exposed to. Take this week's selection that includes a chocolate melting pot. As the blog mentions, the old bowl in a saucepan kinda works for me but I am absolutely going to forget and grab the bowl so this would definitely be safer!


My new piece of kit.

Those of you who follow the blog regularly will know that I'm not one for spending dosh on kit for it to gather dust. With that in mind I thought I'd treat myself to a chocolate melting machine.

I melt chocolate frequently and I'm an old fashioned kinda gal and always use the steam method – saucepan with the bowl on top – never a microwave, personally I don't think you can control the chocolate and microwaves vary. The only downside to the old fashioned method is that it creates washing up. When I saw the Chocolate Melting Pot in Lakeland, I thought it looked neat and, reasonably priced at £19.99, it wouldn't break the bank.

Here it is :


Never let it be said that I don't have your best interests at heart - for the purpose of its inaugural outing I'm keeping it simple.

The plan :


You'll need :


a baking sheet measuring 30x30 cms


a piece of baking parchment measuring 29x29 cms

- slightly narrower than your baking sheet


4 large paper clips


the chocolate melting pot base and one melting pot


Before you begin


Secure your parchment to the baking sheet with the four paperclips


Draw circles on the parchment measuring approximately

6 cms in diameter – I used a straight sided pastry cutter – anything

circular will do


As a guide you'll get approximately 9 circles on the parchment.

Leave space between each circle.


When you've drawn your circles turn the parchment over

so that the pencil side is face down, then secure again with

the paperclips


Off we jolly well go!


Editor's January Pick #18: The dressing to go with the chicken salad (or whatever you fancy!)

Editor's note: I've been on a "fly by the seat of my pants" cooking phase at the moment so stumbling on little recipes like this one are a joy - better still stop me wandering aimlessly around the supermarket wondering where they've moved everything to this week. An extra bonus, if it ever goes terribly wrong I don't have to tell anyone so win-win! Fantastic flavours that go with chickpeas as well as chicken.


The dressing … to go with the chicken salad

Who would have thought you'd be drizzling a quintessential Italian combination of extra virgin olive oil and balsamic vinegar – a marriage we already know is made in heaven – with another Indian classic – tandoori chicken tikka.


The dressing


4 tbsps extra virgin olive oil

1½ tbsps balsamic vinegar

1½ tsps brown sugar

¼ tsp coarse black pepper

¼ tsp cumin powder

pinch of salt


Whilst the chicken is cooking, with a whisk mix together all the dressing ingredients and leave to one side.

A few thoughts so far :

I'd wear gloves when you coat the chicken – turmeric and chilli will stain your hands as well as equipment.

Make sure your “oven tray” has sides – unless you have a burning desire to clean your oven!

I used soft dark muscovado sugar in the dressing.

I marinaded the chicken from 11am – 7.30pm. It's very important that you cover the chicken marinade and keep it in a cold place. If you keep it in your fridge then bear in mind it's raw chicken and as such should be kept on the bottom shelf and more importantly that it is kept away from cooked food.

When the chicken is cooked I know you'll want to taste it – cook's privilege after all – a lot depends on your palate and that of your guests but tasted on its own you may find it a tad hot. I'd suggest that before you rush to judgement wait until you've assembled and tasted the completed salad.

A word about the “heat” of the spices. Remember recipes are meant to be a guide they are not set in stone. If you find the spices too powerful don't let it put you off – try reducing the green chilli paste, turmeric and red chilli powder from 1½ tsps to 1 tsp each.

It's personal taste after all – it's whatever suits you.